How to Draw British Garden Birds: Robin, Blue Tit and Blackbird
Garden birds are the most accommodating models you will ever draw. They arrive on the feeder, hold a pose just long enough to be useful, then flick away before you have finished the eye. The trick is not to chase them. Learn three birds properly — a robin, a blue tit and a blackbird — and you will have a set of shapes that covers almost everything else that lands on your lawn. Each study below builds from a simple block-in to feather groups, legs and eyes, and each one can be finished in a single sitting with a 2B pencil and a sheet of cartridge paper.
Start With Shapes You Already Know
Every garden bird fits inside four shapes: a circle for the head, an egg for the body, a wedge for the tail and a small triangle for the beak. Block those in first, lightly, and adjust them until the silhouette is convincing on its own. If you can recognise the bird when it is nothing but an outline, everything you add afterwards will sit in the right place.
- Head: a circle that overlaps the body by about a third. Too much and the bird looks neckless; too little and it looks like a duck.
- Body: an egg, tilted. The tilt tells you whether the bird is feeding, alert or resting.
- Tail: a tapering wedge, roughly the length of the head for a robin, longer for a blackbird.
- Beak: a triangle whose length matches the distance from eye to beak base.
Try a four-minute thumbnail before you commit to a finished drawing. It costs nothing and shows up proportion problems while they are still easy to fix.
The Robin
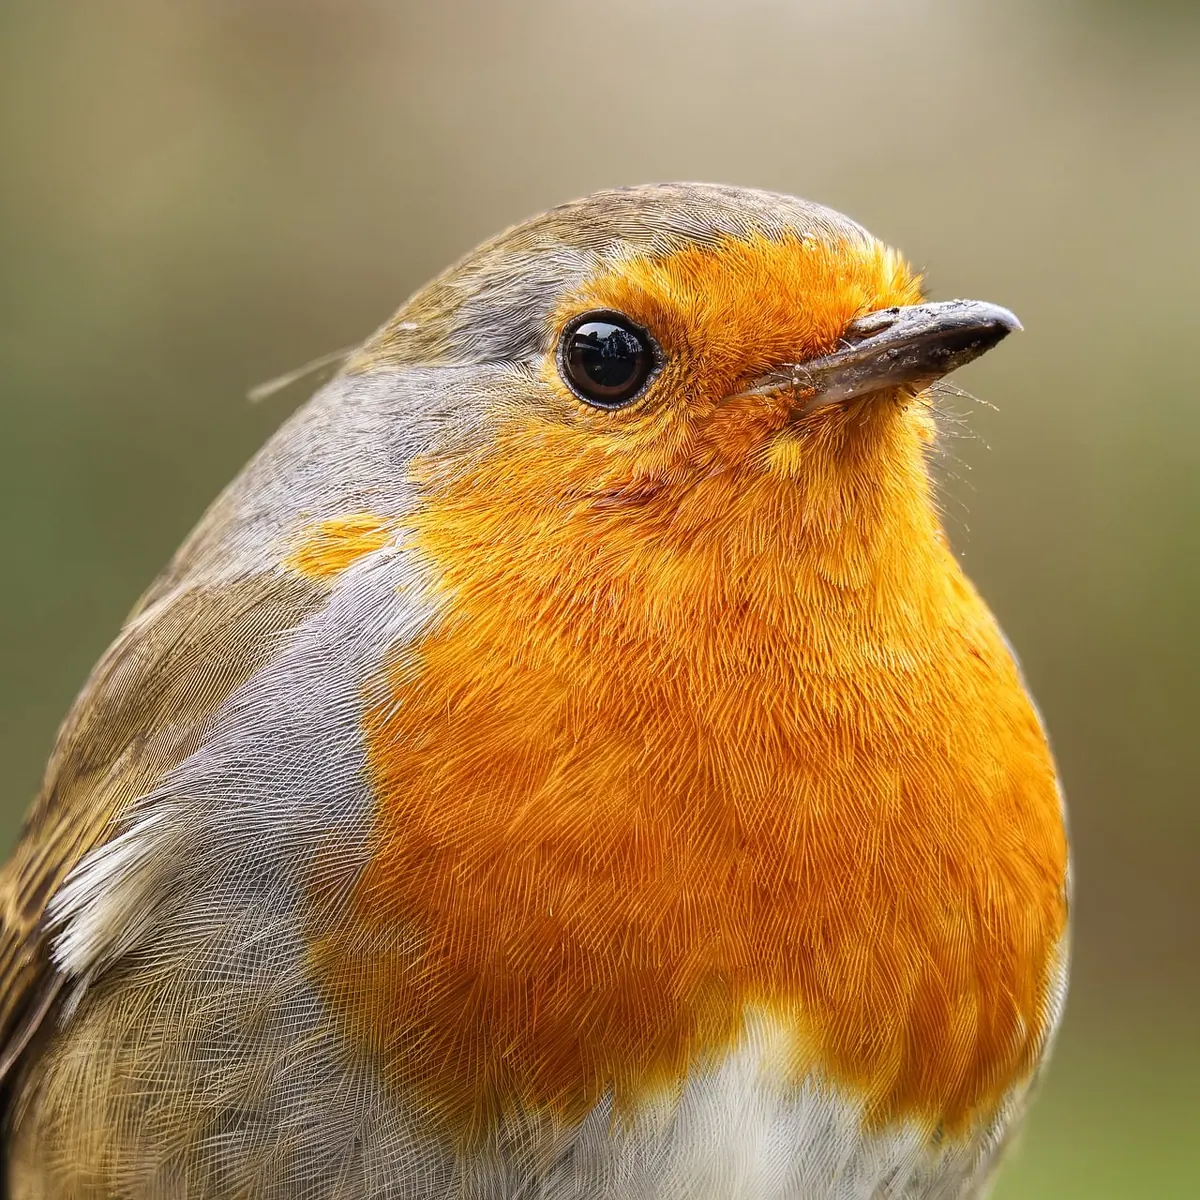
Nothing about a robin is slender. The body is a wide egg tipped forward, the head sits high and close against it, and the tail is short enough to look like an afterthought. Block the body first, then place the head, then keep that rounded chest bulge. The fullness at the front is what makes a robin read as a robin rather than a generic brown bird.
Feather groups
You need three tonal areas only: the olive-brown back and wings, the pale belly, and the orange-red face and breast. That orange field runs from the forehead, around the eye and down over the chest as a soft bib. Do not outline it with a hard line — let it fade into the brown at the sides. The folded wing shows two layers: a rounded shoulder of small coverts and the long primary tips pointing back towards the tail. Draw the shoulder as one shape and add two or three light lines across it.
Legs and eye
Robin legs are thin, dark and slightly ridiculous in proportion to the body. Two strokes, a small joint for the ankle, then three short toes curling forward and one back. On a feeder rim the toes wrap around the edge; on the ground they splay. The eye is a small dark bead set fairly high on the head with a faint pale ring. Resist enlarging it. One tiny highlight just off-centre is enough to make it look alive.
The Blue Tit
Smaller than the robin, and you feel it most in the head. The skull is large in relation to the body, which gives the bird its busy, top-heavy look. Block a round head, a compact egg body and a tail slightly longer than the robin's. Blue tits hang at awkward angles from feeders and twigs, so sketch one upside down as well as on a perch — it teaches you the head-to-body relationship faster than a tidy side view.
Feather groups
This is a bird of patches, so let the patches do the work: blue cap, white cheeks, black eye stripe, yellow underparts, blue wings with a pale bar. Don't draw every feather in the cheek; the white is simply a shape. Where yellow meets blue on the flank, soften the boundary — feather edges blur, and hard separation makes a drawing look like a diagram. Suggest the wing bar with a single light patch, lifting it out with a kneaded eraser if it gets muddy.
Legs and eye
The legs are tiny and blue-grey, often only a few millimetres on the page. Two short strokes and one gripping foot will do. The eye is the interesting problem: it sits inside the black eye stripe, so it can vanish entirely. Draw a dark dot, then place a small bright highlight, and add one light stroke if you need a hint of an eye ring.
The Blackbird
Where the robin is round and the blue tit is compact, the blackbird is long. Bigger head, longer body, longer tail, sturdier legs. The male is essentially a black silhouette, which means posture and edges carry everything. Draw the head slightly smaller than feels comfortable, and keep the bill long and straight: orange-yellow on the male, browner on the female, who is otherwise warm brown with a streaked breast and pale throat.
Feather groups
Treat the male as a study in tone rather than colour. Keep the crown and upper back a shade darker, the breast slightly lighter, and let the folded wing appear as a long shape tapering about two-thirds of the way down the tail. The tail is long and straight with a slight opening at the tips. A little highlight along the wing edge gives feather texture without any individual feather drawing at all — side of the pencil, light pressure.
Legs and eye
Blackbird legs are sturdy, with a clear joint where the leg meets the foot, and the bird hops rather than walks, so the legs often look compressed and angled forward. The male has an orange-yellow eye ring around a dark eye. Draw the ring first as a light circle, then place the dark centre, keeping a sliver of white paper for the highlight.
Feather Groups: Think in Patches, Not Pencils
Feathers look complicated because we try to draw them one at a time. Work in groups instead, and the pencil marks will suggest far more than they describe.
- Direction: strokes follow the way feathers grow — down the back, backwards along the wing, out towards the tail tip.
- Edges: soft where one group meets another, sharper at the tips of primaries and tail feathers.
- Value: three tones are plenty — light, mid and dark. Squint at the bird, then squint at the drawing, and compare the patches.
- Detail: spend it on the head, breast and shoulder. Leave the belly and tail quieter so the eye has somewhere to rest.
If the light and dark patches match, the details will look after themselves. Most drawings fail at the shapes, not the feathers.
What to Do Next
Copy the three studies once, then work from reference photographs and, finally, from life. A feeder outside a window is the best studio you will ever have.
- Draw each bird five times from photographs: side view, front, back, feeding and perched. Same bird, different angles.
- Set up a feeder where you can see it from your desk and fill a page with thirty-second thumbnails. Speed matters more than accuracy here.
- Pick your best thumbnail and redraw it slowly, blocking shapes before any feathers.
- Leave it for a week, then draw it again. Your eye will spot the errors your hand was happy with.
Keep the pencil sharp, keep the first lines light, and remember that a garden bird is rarely still. You are learning a shape, not copying a photograph.
You Might Also Like
A 30-day drawing challenge using household objects, with a week-by-week list, plus practical tips on observation, line confidence and shading habits.
Artist's block is rarely about missing supplies. Five free drawing exercises — timed studies, blind contours, master copies and more — to get your hand moving again.